How to Add Tickets
- To get started, sign up or log in to Ticketbud and create an event. If you've already created an event, from your Account Dashboard click Manage Events below the event.
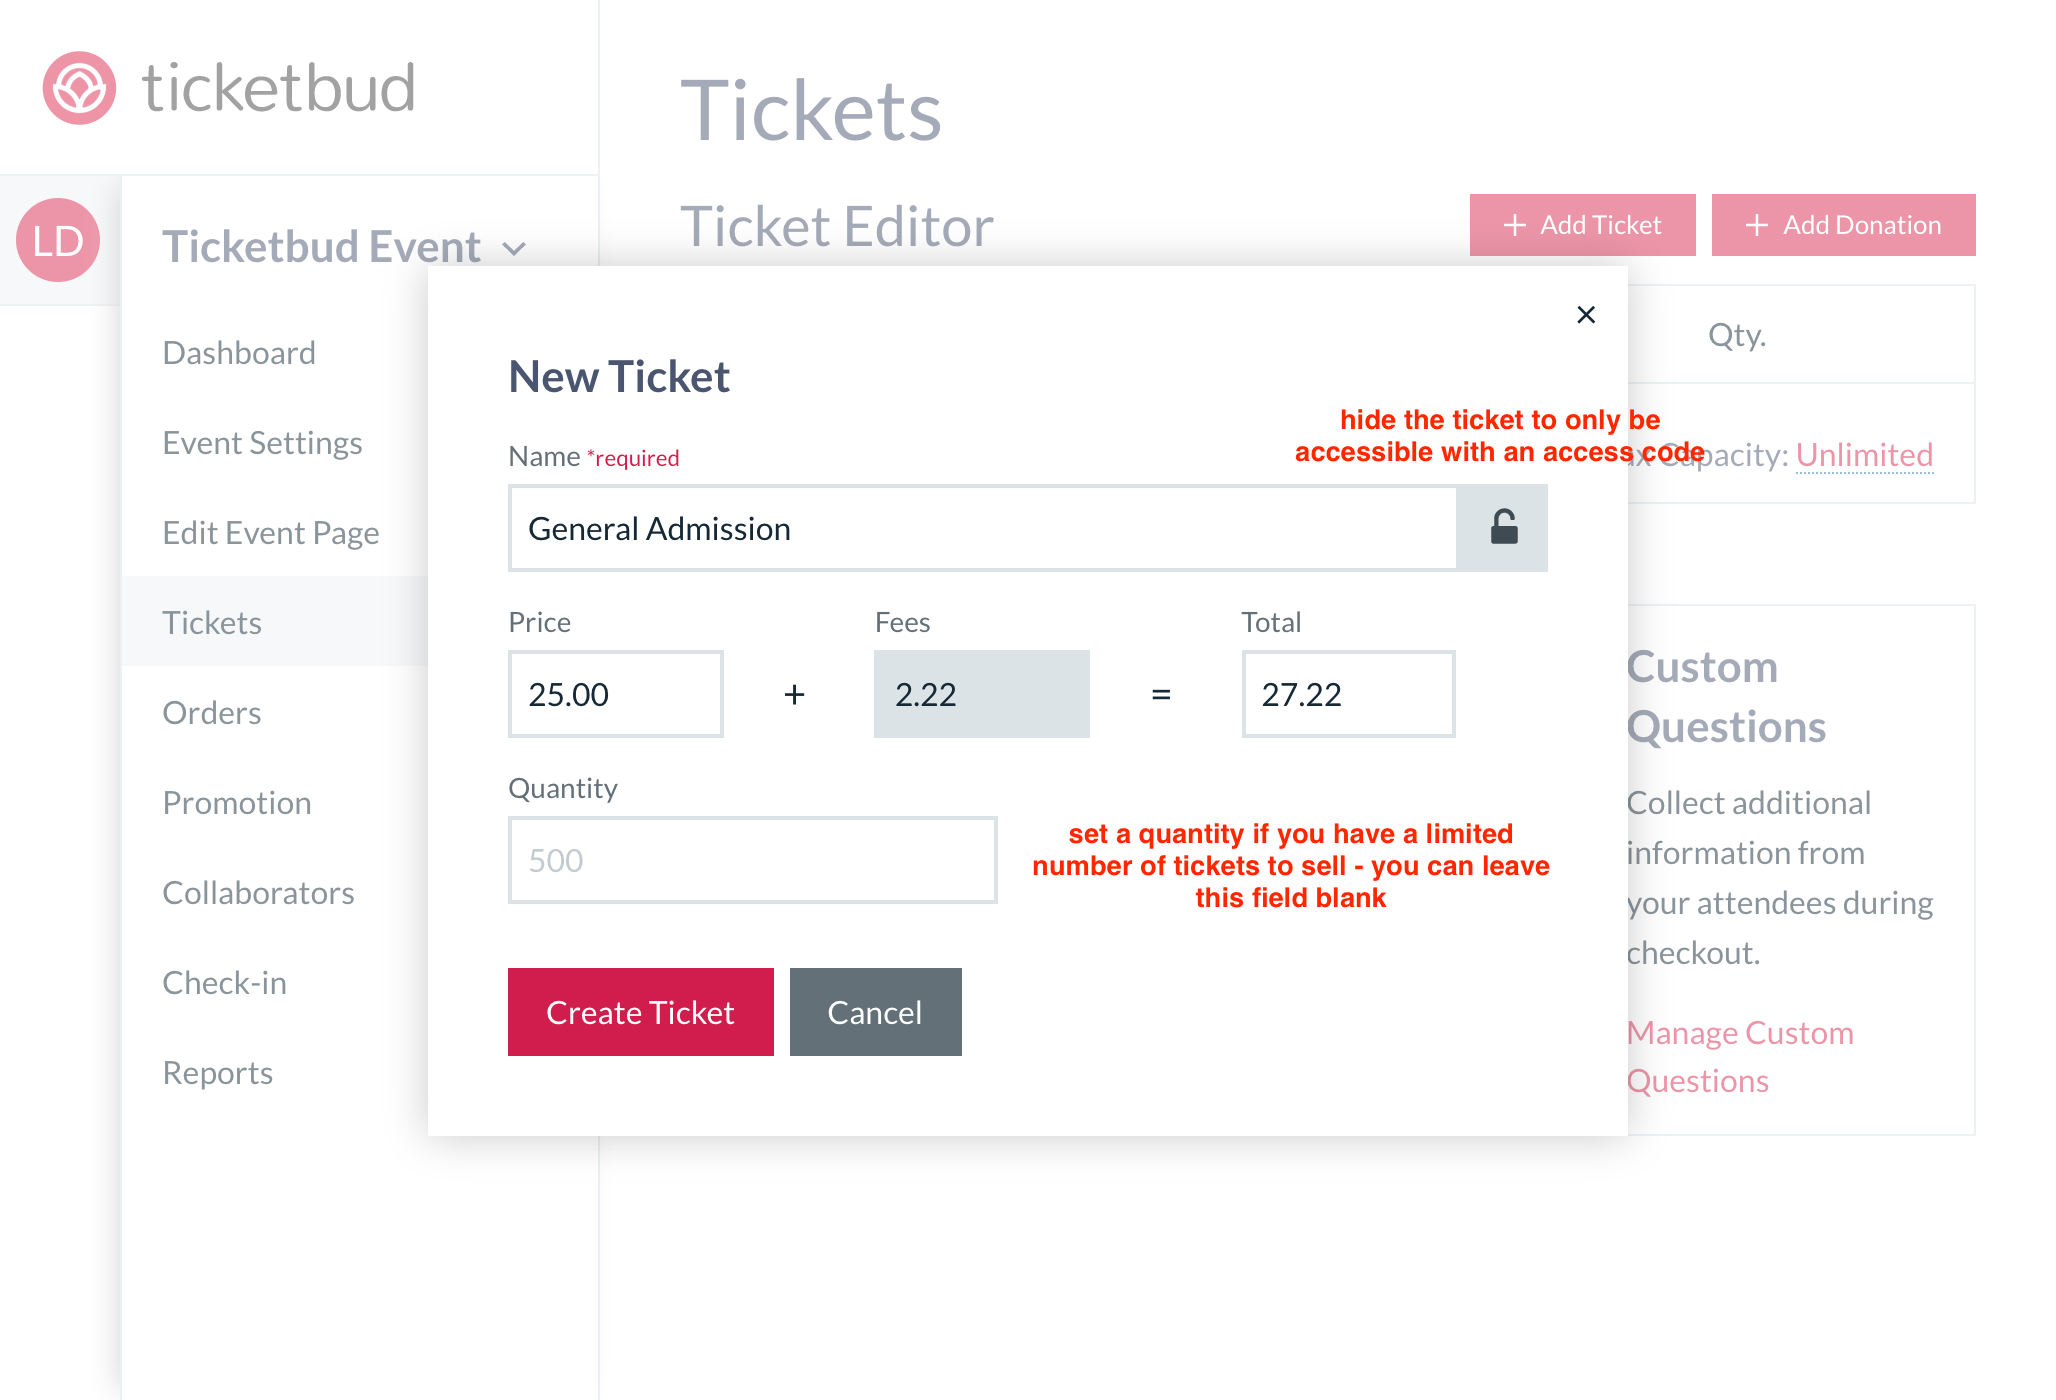
- Select Tickets from the left menu and click the Add Ticket button

- Once you add a ticket, it will appear in the ticket box.
By default, fees are passed along for your attendees to pay making Ticketbud free to use. If you would like to set to absorb fees, check out this help article.
Manage Tickets
Beside each ticket added, you can navigate to the ticket's setting with the gear icon.
Description
Include a ticket description and choose where you want to display the description (on the web and/or on the PDF ticket). The ticket description is characterized by a info icon which appears next to the ticket name on the live page. Guests can click on the icon to view the description.
Group ticketing
Min # tickets per purchase: set the minimum number of tickets that can be purchased at a time.
Max # tickets per purchase: set the maximum number of tickets that can be purchased at a time.
Tickets purchased in groups of: set to require tickets to be purchased in sets of here, default is 1.
Sales schedule
Sales starts/ends: set a start and end time on a ticket. Most useful for early bird or tiered pricing style tickets.
For sale?: toggle sales on or off.
POS enabled?: enable the ticket to be sold at the door with our mPOS.
Show remaining?: set the remaining ticket quantity to display on the live page or leave it hidden.
To watch a video walkthrough of how to add tickets click here. If you have any additional questions, feel free to email us at cs@ticketbud.com.
