Step 1: Create Your Event
In order to start selling event tickets online you’ll need to sign up for Ticketbud (it’s free to sign up and get started). If you already have an account, you can simply sign in.
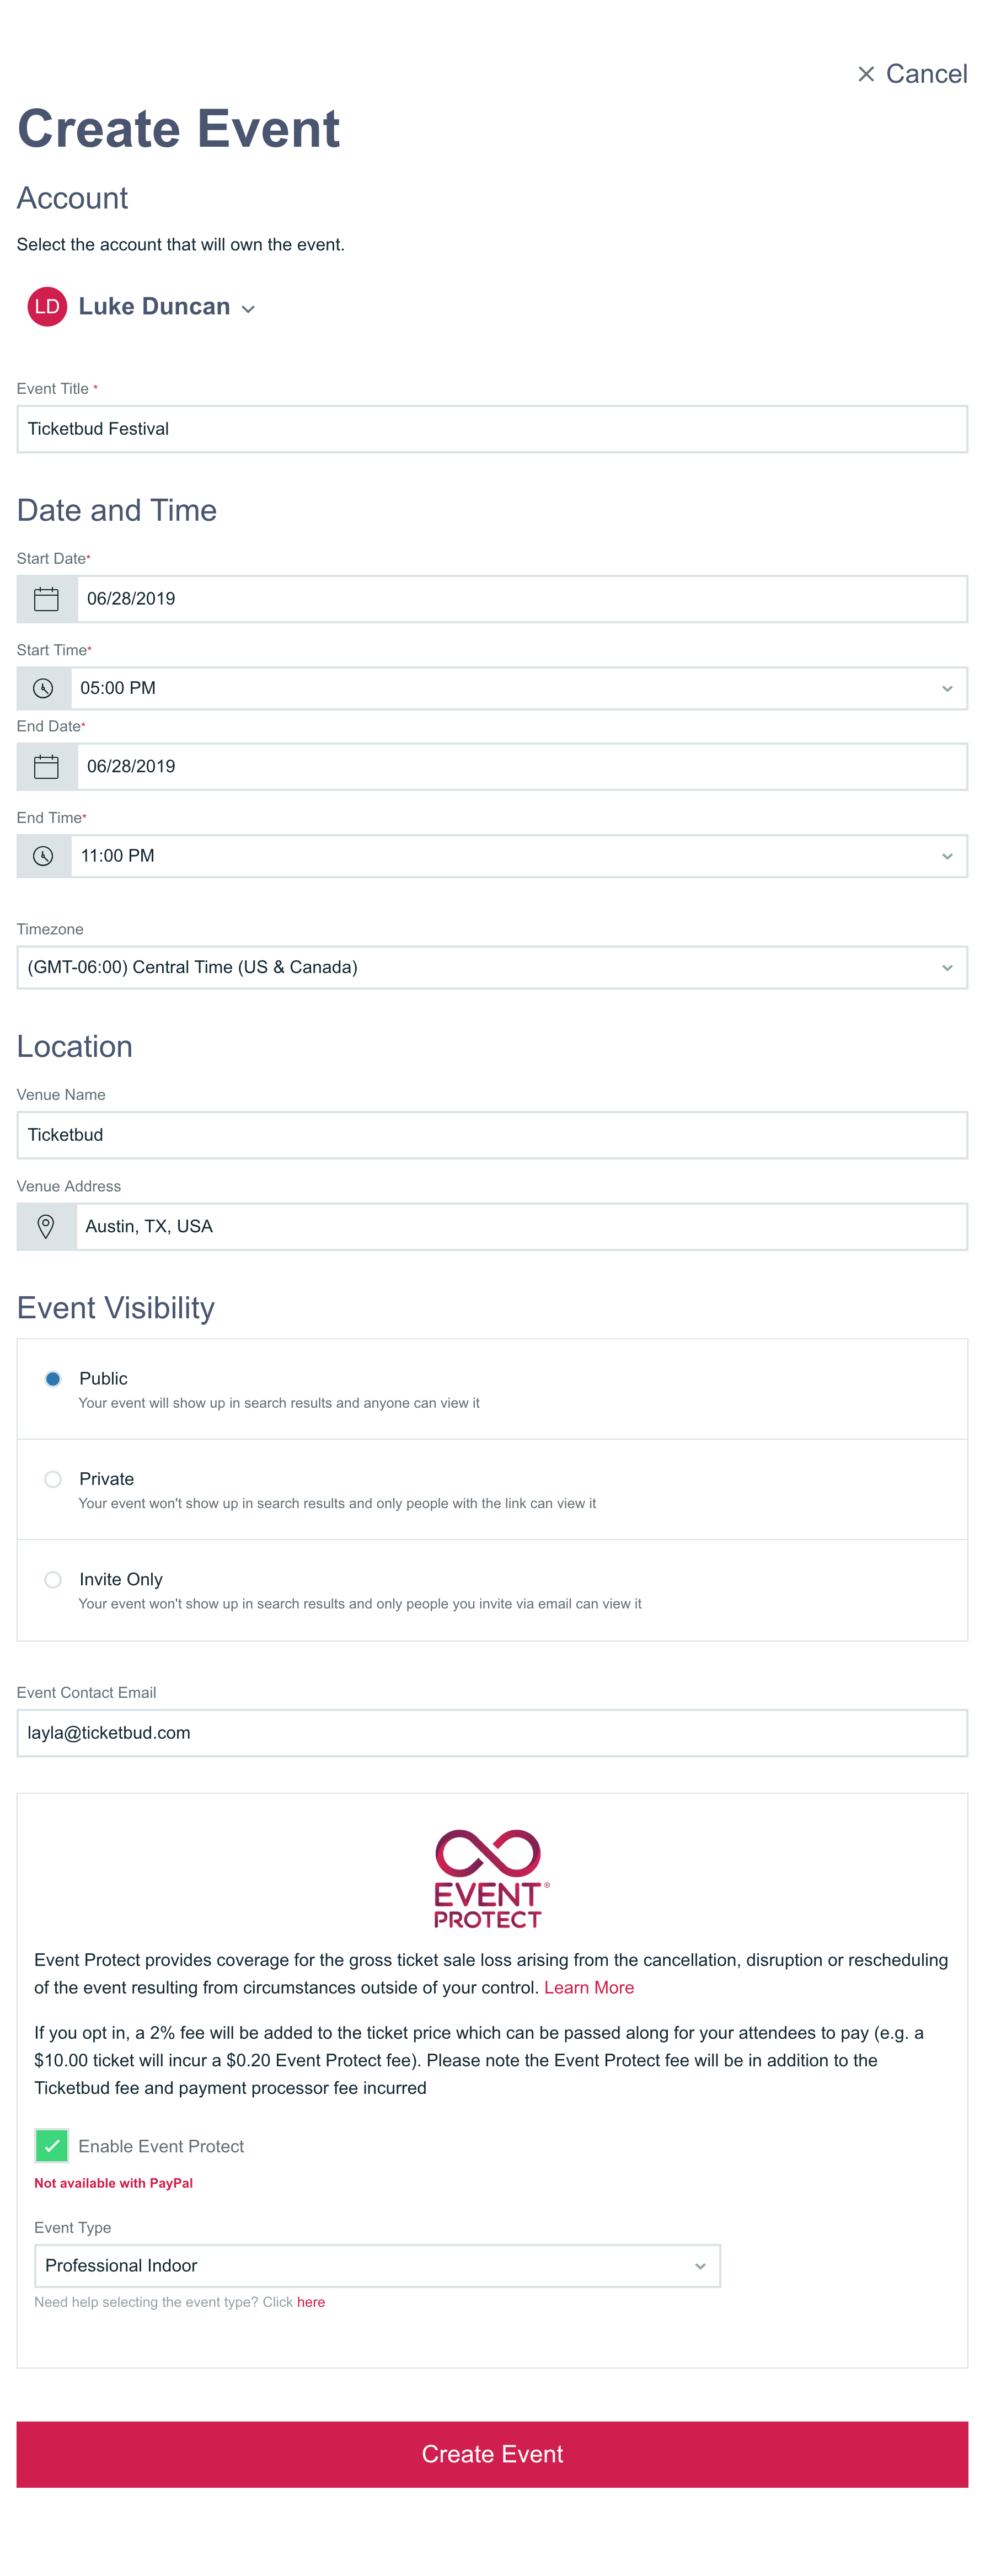
- From your Account Dashboard, click on the Create New Event button located on the left menu. If you’ve just signed up, you’ll be redirected to the Create Event page automatically.
- Fill out the fields on the Create Event Page - this doesn’t have to be perfect, you can always make changes later!
- Click the Create Event button to continue.
- From there, you’ll be directed to your Event Dashboard. Your event dashboard is where you’ll edit and manage your event.
 Step 2: Edit Your Event
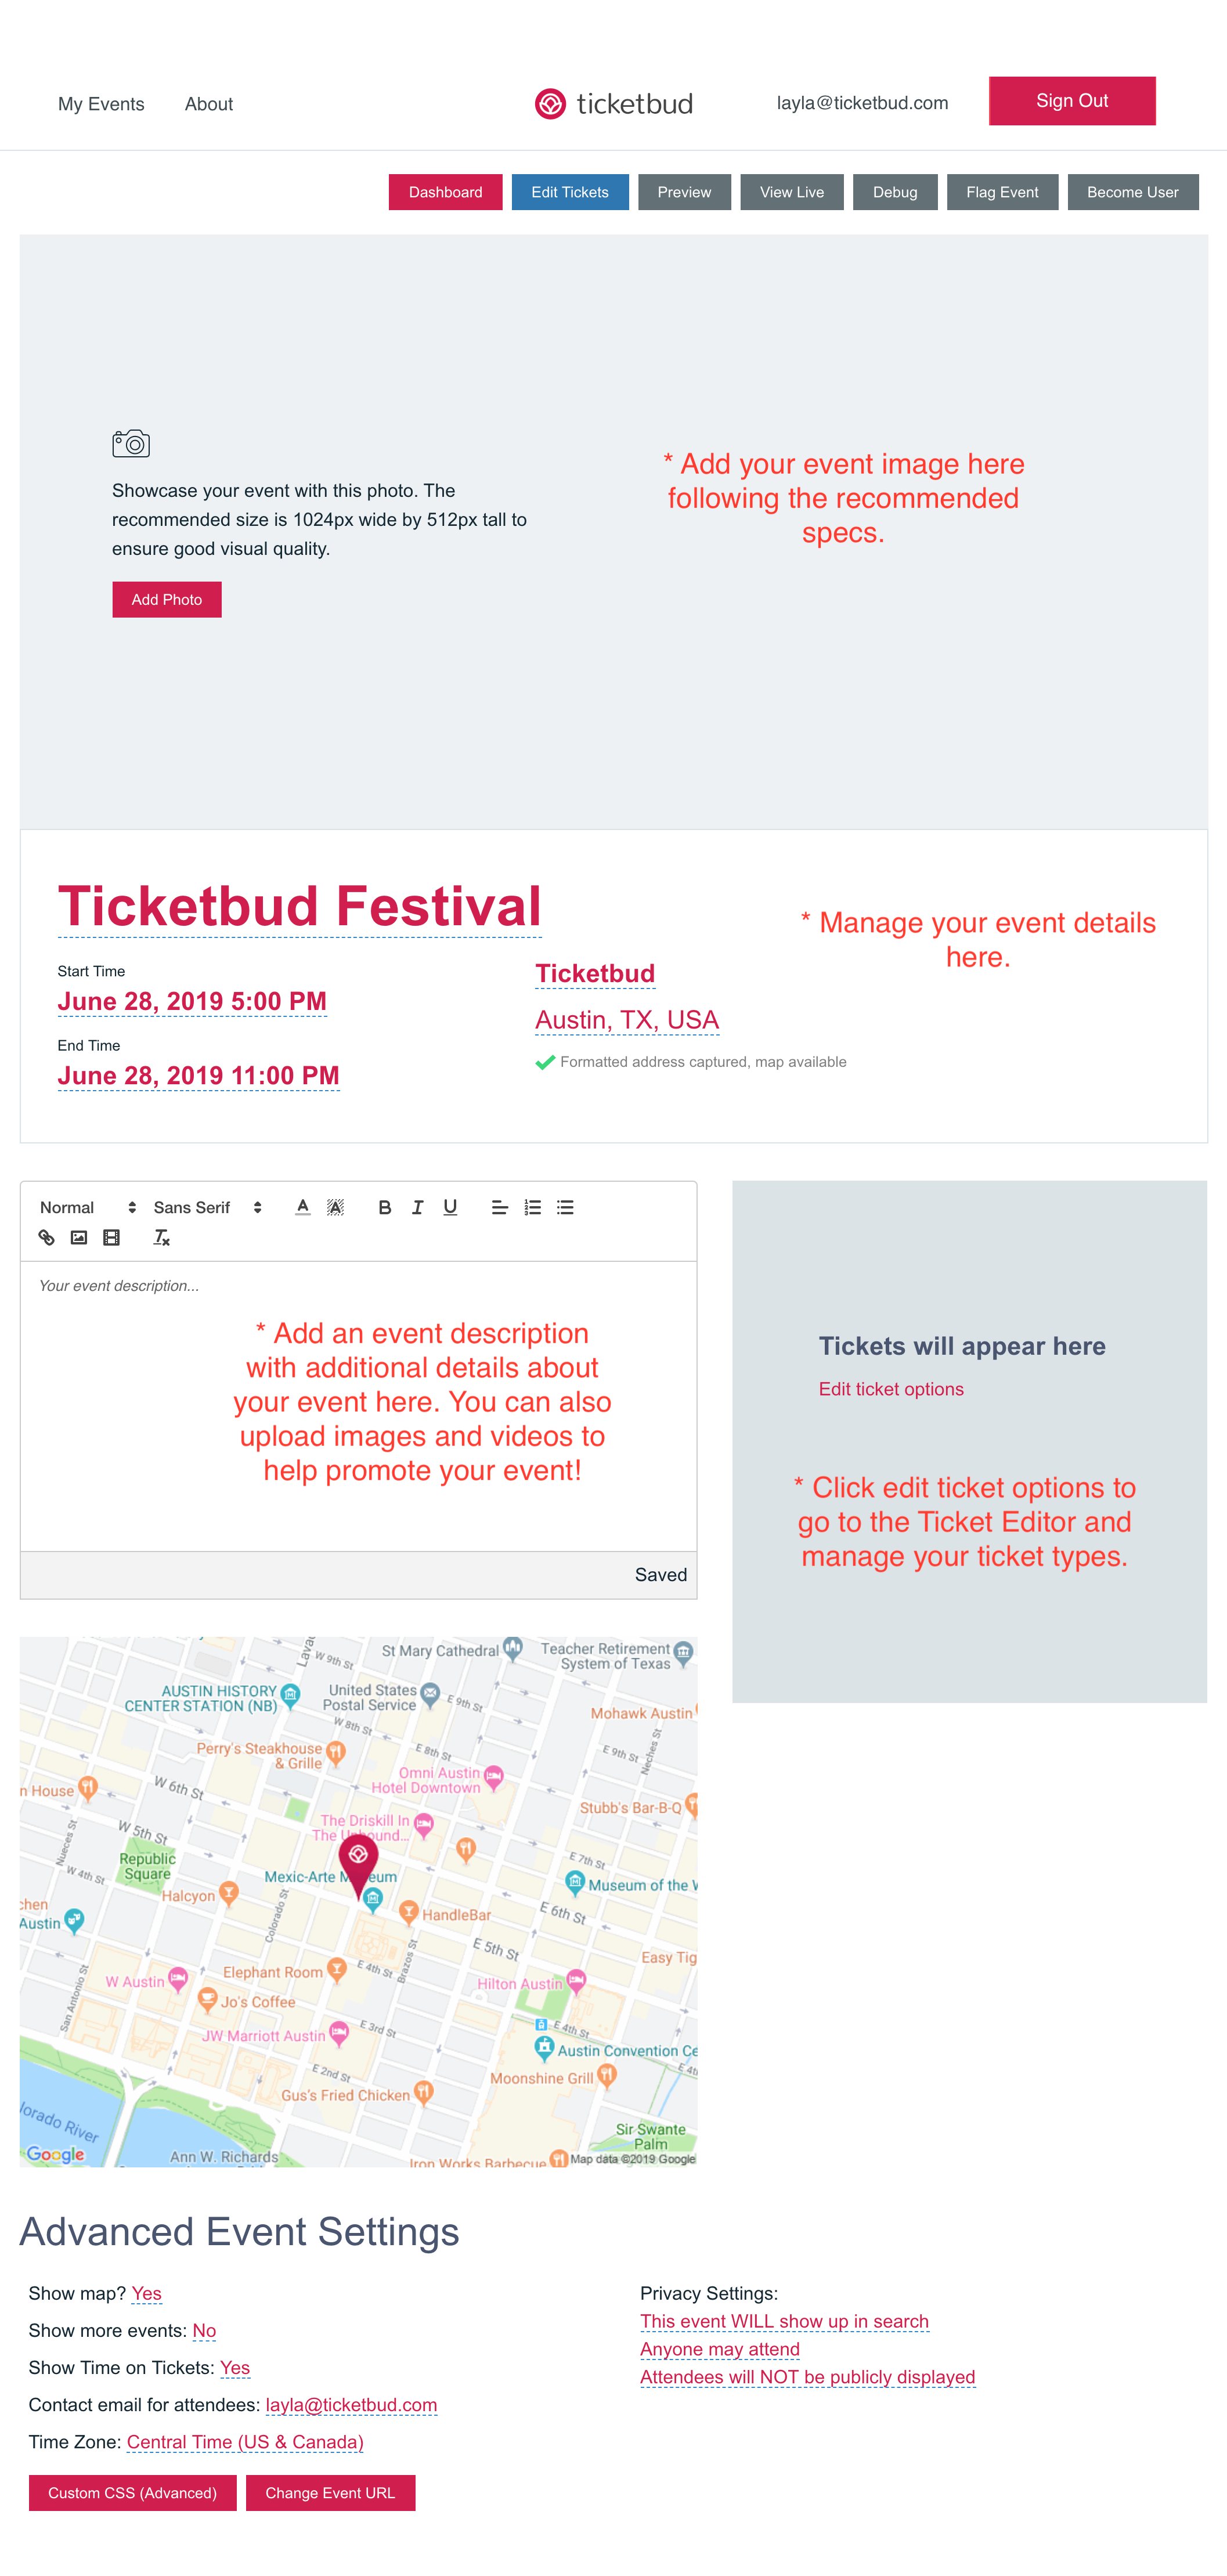
The Edit Event Page is a blueprint for your live event page. Here you’ll be able to customize the look and feel of your event page by adding an image and event description. You can also manage details of your event like its date and time.
- From your Account Dashboard, select Edit Live Page. If you’re on your Event Dashboard, click on Edit Event Page from the left menu.
- Check out the annotated Edit page below for a summary of its tools and functionality.

Step 3: Manage Your Event
The Manage page is your event dashboard. Here you’ll be able to utilize Ticketbud’s industry-leading event management tools and features to make your event a success. We’ll go over a few of them below to help you get started.
Ticket Editor
- From your Account Dashboard, select Manage.
- Select Ticket Editor from the left menu. You can also navigate to the editor from your Edit Event Page by clicking Edit Ticket Options.
- Click on the Add Ticket button and fill out the fields. Once you’ve successfully added a ticket, the ticket will display in the Ticket Editor window.
- From there, you can configure your ticket with a sales schedule (perfect for Early Bird pricing) and add a ticket description by clicking the Options button next to the ticket type.
Payout Configuration
Receive payout for your event on a daily, weekly, or monthly schedule. Ticketbud works with three payment processor options making the checkout process frictionless. Fees are passed along to your attendees making Ticketbud free to use!
- From your Account Dashboard, select Manage.
- Select Payout Configuration from the left menu.
- Set your event’s currency from the Currency dropdown and then choose a payment processor option to get started. You can learn more about our payment processor options and their pricing here.
Step 4: Activate Your Event
When you’re ready, you can activate your event and start selling tickets within minutes. Just click the Activate Event button located on the top right corner of your Event Dashboard!
If you have any additional questions or concerns, feel free to email us at cs@ticketbud.com.