Google Analytics is easily the most powerful free marketing tool around. You can use it to discover how people find out about your site, create customer personas with demographics information, and learn about purchase funnels for attendees. This guide includes steps on how to create your Analytics account, add it to your Ticketbud account, and lastly, create goals that you and your team can measure.
In addition to this guide, we recommend referring to Google's Analytics Set Up guide for additional assistance.
How to create your Analytics account
- To get started, log in or sign up for Google Analytics.
- Once you've signed up or logged in, visit your Google Analytics dashboard page.
- Click Admin.
- Select an account from the menu in the ACCOUNT column.
- Select a property from the menu in the PROPERTY column.
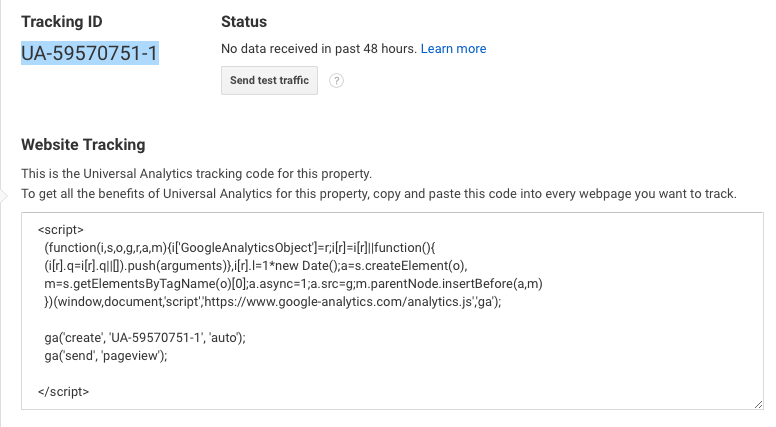
- Under PROPERTY, click Tracking Info > Tracking Code.
- Copy the Tracking ID displayed at the top of the page.

Add your Analytics ID to your event page
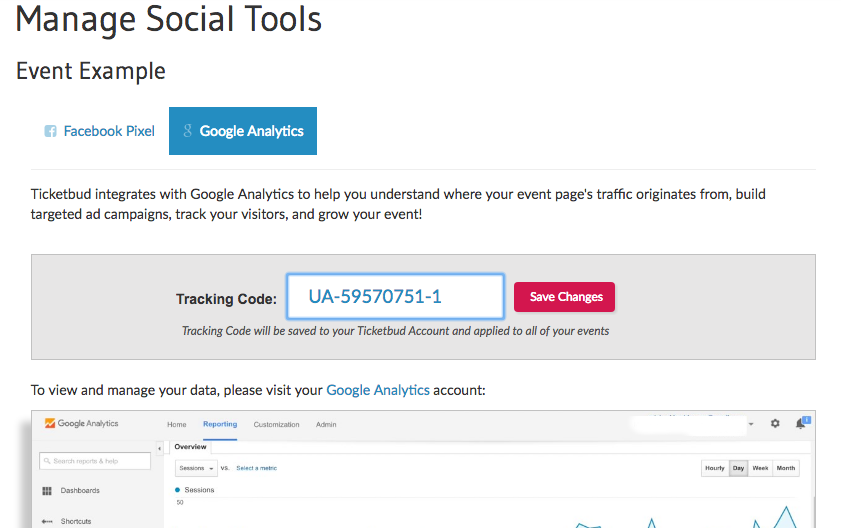
- Sign up or log in to Ticketbud and create an event. If you've already created an event, click My Events on the top navigation bar and select your current event. Navigate to your event's Dashboard and select Social Tools from the left pane.
- Toggle to the Google Analytics tab.
- Paste the Tracking ID in the Tracking Code field and save. Make sure there aren't any extra spaces when pasting the code. Please keep in mind Facebook Pixels are applied on a per account basis.

It can take up to 24 hours for the code to go live. We recommend getting this set up ahead of your event page going live and accepting ticket sales. In ensure that the code is working, go to your Tracking Code page and click on the Send test traffic icon underneath Status. For additional troubleshooting, check out this help article.
How to create goals
To collect the most useful data from your event, you'll need to set up goals in Analytics. Check out this help article on how to create, edit, and share goals.
If you have any additional questions, feel free to email us at cs@ticketbud.com.
