Creating a custom link for your event page encourages you to promote your event by creating a link that is unique and easily shareable.
How to Create a Custom Link
- To get started, sign up or log in to Ticketbud and create an event.
- From your Account Dashboard click on Manage Event to navigate to your Event Dashboard.
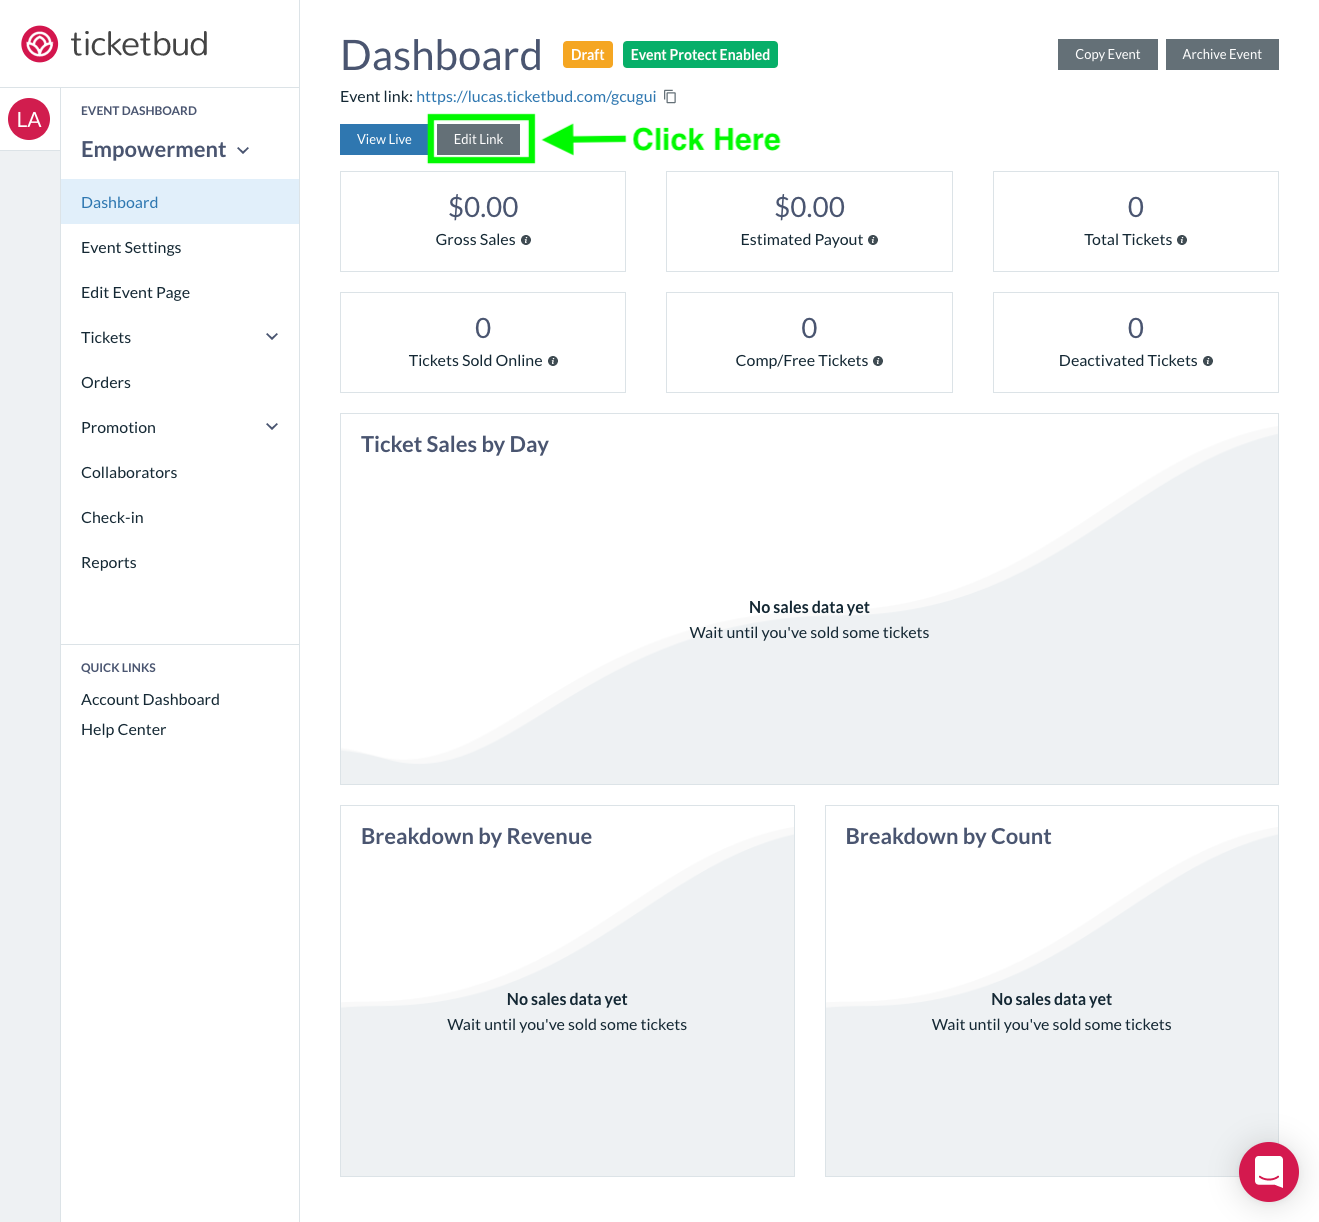
- From your Event Dashboard, click on the Edit Link button under your events link.

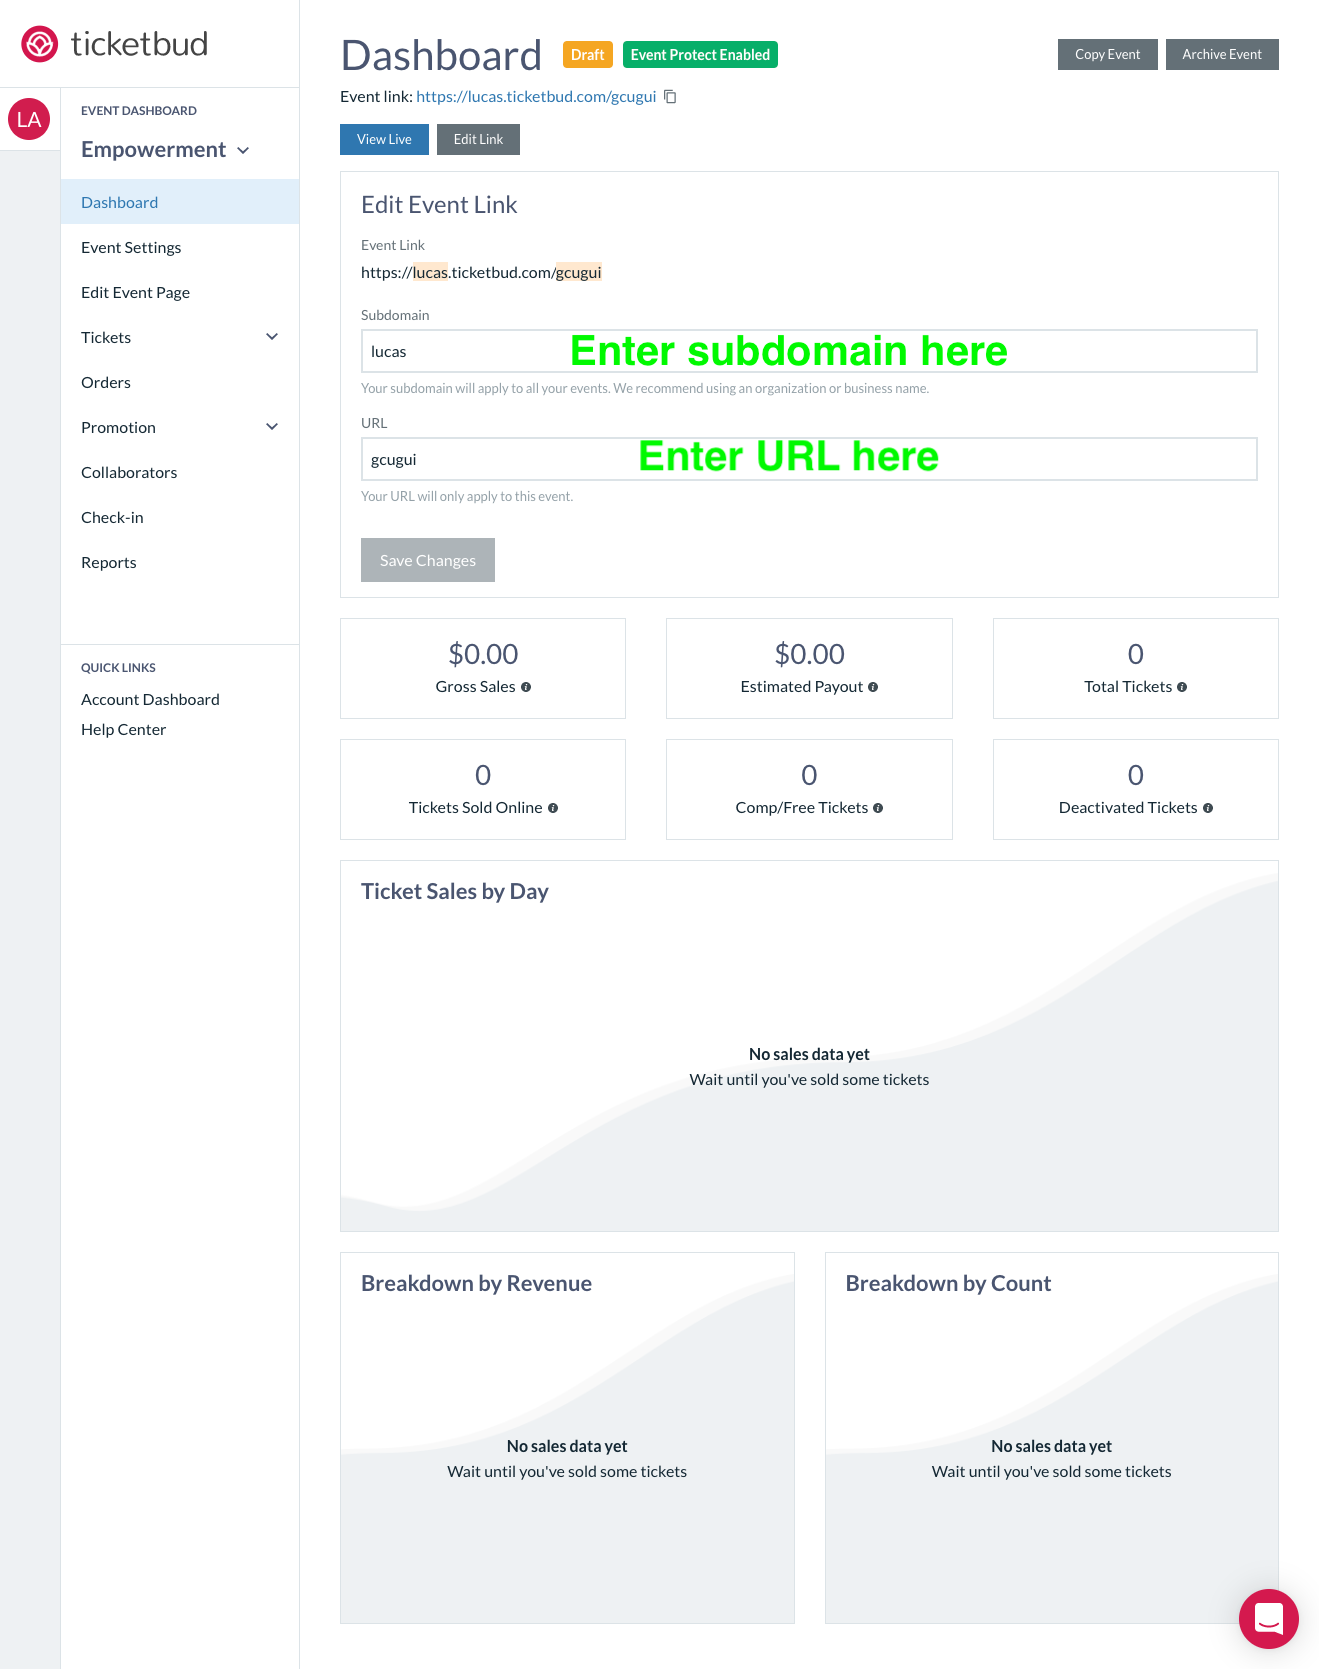
- First fill in the subdomain: This will apply to all your events (we recommend using an organization or business name).

- Next enter the URL: it will only apply to this event.
- Click Save Changes once you’re all set.
There are two fields associated with the event page URL- the subdomain and the URL. They apply to the event link as follows: Subdomain.ticketbud.com/URL. Both fields are required to create a URL. You cannot create a subdomain without a URL, vice versa.
Subdomain: the subdomain field applies to ALL events associated with the Ticketbud account and CANNOT be changed once set. The subdomain should be generic. So we recommend using an organization or business name.
If you have more than one event on Ticketbud, sharing the subdomain.ticketbud.com link will take your attendees to an landing page where all your public events are listed.
URL: the URL field applies on a per event basis and can be changed once set. We recommend using a URL that is event specific. Sharing the subdomain.ticketbud.com/URL will take your attendees directly to the event page.
If you have any additional questions, feel free to email us at cs@ticketbud.com.
